You know that sinking feeling when you realize your 9-pin cable is busted? Yeah, I’ve been there too. Whether it’s for an old-school joystick, a monitor, or some obscure piece of tech that still uses a 9-pin connector, it’s not like you can just grab a shiny new replacement at the store. That’s exactly how I got into fixing these things myself. Let me tell you—figuring out how to fix a 9 pins cable can be equal parts frustrating and satisfying, but once you get it working again, you’ll feel like a total rockstar. So, let’s dive into it. I’ll walk you through what’s worked for me (with a little trial and error of course), and hopefully save you from that moment of “Should I just toss this?”

Assess the Damage First
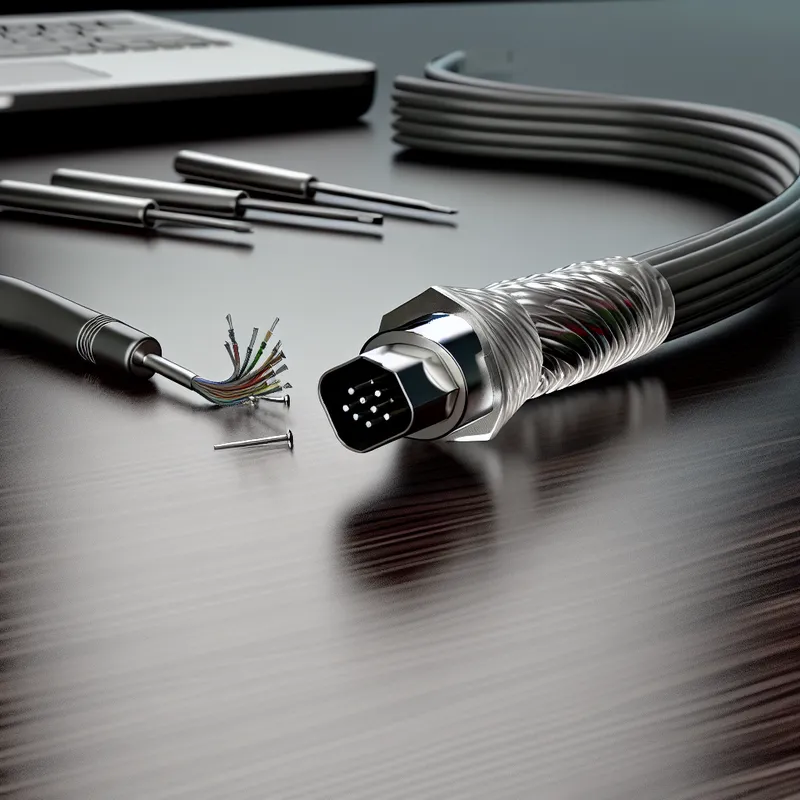
Before I pull out the tools or start cutting wires, I’ve learned the first step is to inspect the cable. Sometimes, the issue is obvious—like frayed wires, a bent pin, or a connector barely clinging to life. But then there are those times when everything looks okay, and you’re left scratching your head, thinking, “Is it me, or is the cable gaslighting me right now?”
Start small—check if any of the pins are loose, bent, or missing altogether. You’d be surprised how often it’s something as simple as one pin pushed slightly out of alignment. Use a small flathead screwdriver or a toothpick to straighten it out gently. It sounds easy, but fair warning: this part feels a bit like trying not to spill your coffee while walking. Take your time, and don’t rush it.
Gather Your Tools
Okay, so maybe your cable needs more than a quick pin adjustment. That’s cool—you’ve got this. You’ll need a few tools, and I didn’t realize how important these were until I tried (and failed) using just a utility knife and duct tape (spoiler alert: don’t do that). Here’s what I’d recommend:

- Small screwdriver set: Especially flatheads and Phillips for opening connectors or prying things apart.
- Soldering iron and solder: Don’t freak out if you’ve never soldered before; it’s intimidating at first, but you’ll get the hang of it. Think of it as tech DIY.
- Wire strippers: You could try using scissors, but trust me, they’re not as precise and can wreak havoc on tiny wires.
- Multimeter: This little gadget saved me more times than I can count—it’ll help you test if the circuit is actually working or not.
- Heat shrink tubing or electrical tape: You’ll need these for insulation. I personally love heat shrink tubing because it looks clean and professional, but use whatever you’ve got.
Most of this stuff is pretty affordable, and if you’re into tinkering, you’ll end up using it for other projects anyway.
Step 3: Solder It Together
This is where the soldering iron comes in. Once you’ve matched the wires, you’ll twist them together (just a tiny bit for stability), and then solder each connection. It’s a small, satisfying victory every time a wire clicks into place. If you’re new to soldering, here’s a quick tip: don’t overdo the solder! You want enough to create a strong bond but not so much that it looks like a blob of silvery goo.

Oh, and don’t forget to slip your heat shrink tubing onto the wire before soldering it together. I can’t tell you how many times I’ve soldered the perfect connection only to realize I forgot the tubing and had to start over. Ugh—learn from my mistakes!
Testing Time!
Here’s the moment of truth. Plug that baby in and see if it works! If it does, congrats—you’re officially a cable fixer. If it doesn’t, don’t beat yourself up. Double-check your solder joints to make sure none of them are loose or touching each other. Even experienced folks like me have to go back and tweak things every now and then. Patience is key—it’ll work eventually.